Combat and routes
Wizard Alchemy Bosses & Map Guide
The map is a resource system. Bosses, mutants, chests, hidden shops, and safe sell points all need to be linked into a loop.
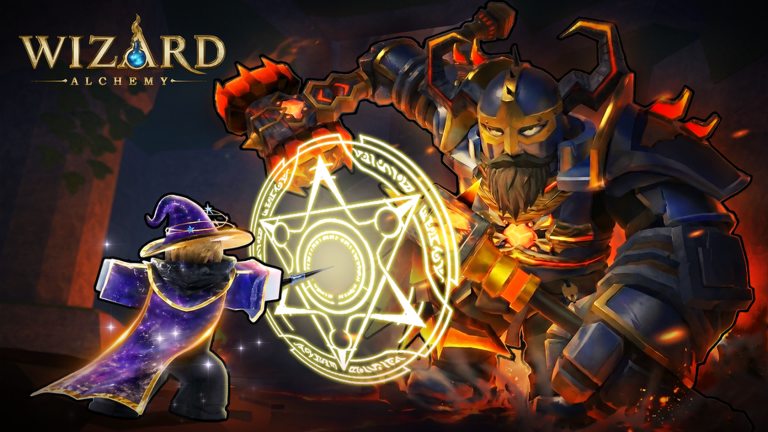
Dwarf King
Dwarf King is valuable for gold, boss drops, and late-game practice. Do not brute-force him with HP alone. Learn the red-flash parry, dash during cooldowns, and keep enough range to avoid trading every hit.
Boss and Combat Videos
Mutant Targets
Mutant Warhammer Dwarf
Best Furnace Core target in current community routing. Prioritize when crafting Dragon Breath or other high-MP spells.
Mutant Archer Goblin
Backup Furnace Core route above the Dwarf King Cave, especially when Warhammer routes are crowded.
Important Landmarks
| Landmark | Why It Matters | What To Check |
|---|---|---|
| Waterfall | Hidden shop and chest checks | Wand shop route, chest spawns |
| Lighthouse | Repeatable chest landmark | Exterior and interior paths |
| Mountain Paths | Transit to elite routes | Alcoves, chest spawns, mutant access |
| Dwarf King Cave | Boss and elite density | Dwarf King, nearby chests, Mutant Archer route |
| Treehouse | Hidden staff and high-end gear route | Shop access and exploration reward |
Parry Basics
When enemies flash red, press F during the reaction window. A clean parry can fully prevent incoming damage, which is why offensive builds with lower HP can still clear dangerous fights.
Practice with the Parry Trainer before long Dwarf King sessions.